What is WireGuard?
WireGuard is a communication protocol and free and open-source software that implements encrypted virtual private networks (VPNs). The WireGuard protocol passes traffic over UDP.1
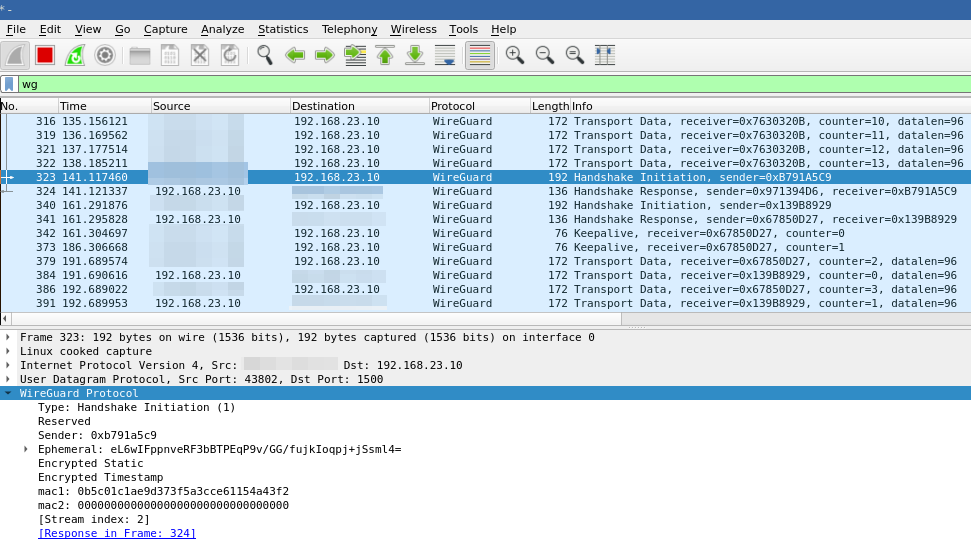
That is the Wikipedia definition which slightly creates an image of what WireGuard is.
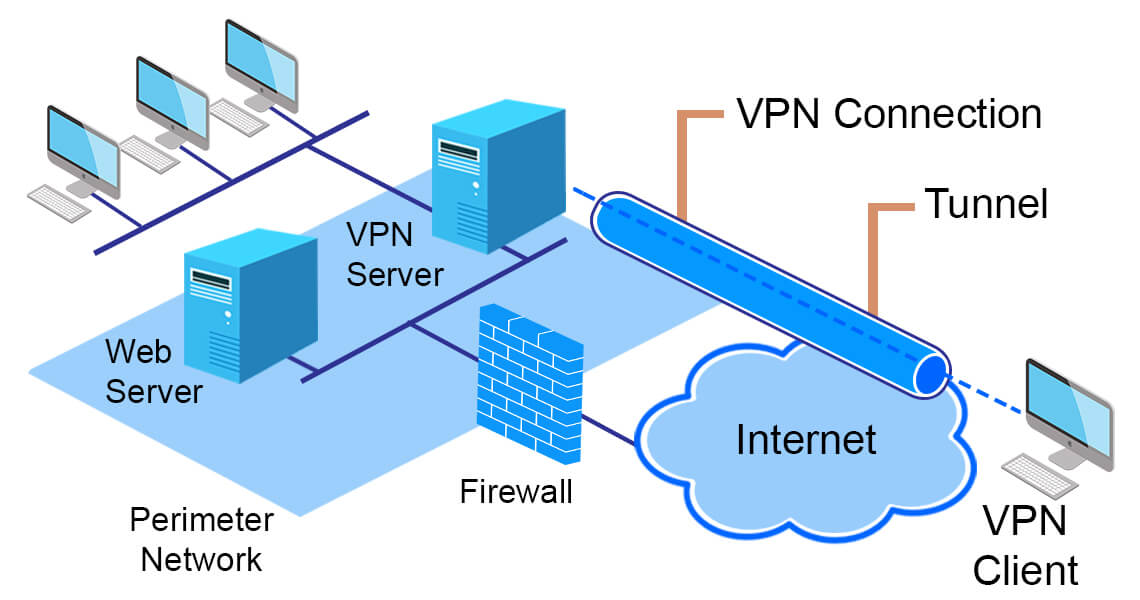
In VPS setups, we usually run multiple services which listen to several ports on the host. Each exposed port to the public network (the Internet) expand our attack surface therefore each service requires care and attention for their security.
In a corporate setup, these issues are usually taken care of by cyber-security, networking professionals and system admins. But in a homelab environment where you just want to self-host your own services, where you create Docker containers and expose them to the network, it is not usually the case.
On another hand, what if you (with your laptop) and your server are not in the same local area network? Router is pretty far away to route your packets to your server’s local IP which is written on a tiny piece of paper.
- Maybe you can write your router’s public IP to the same paper before leaving home, then port forward to your homelab?
- It is very likely that it will be changed until you sit in a cafe.
- What if I buy static IP from my internet service provider?
- You don’t really want to expose the same router to the internet which your mama and papa watch their favourite show in the evening.
I don’t want to yap too much; you just create a VPN in a VPS (with public IP) and connect clients. WireGuard is a good option due to:
- Simpler to setup and configure
- Encrypted connection
- Minimized attack surface
Setting up the VPS side
Install required packages
Install the wireguard and ufw (uncomplicated firewall) packages from your distribution’s repositories.
- For Fedora/RHEL based distros:
~$ dnf install wireguard ufw
- For Debian/Ubuntu based distros:
~$ apt install wireguard ufw
Enable IP forwarding
Add these lines to /etc/sysctl.conf (kernel parameters file):
net.ipv4.ip_forward = 1
net.ipv6.conf.all.forwarding = 1
Run “sysctl -p” to load in sysctl settings.
Creating keys and configuration file
Create configuration directory and change to that directory:
~$ mkdir /etc/wireguard && cd /etc/wireguard
Generate server private key of server:
~$ wg genkey | tee /etc/wireguard/server_private.key
Change private key file permissions (only owner/root can read+write):
~$ chmod 600 /etc/wireguard/server_private.key
IMPORTANT: Setting restrictive file permissions to private keys in general is really crucial especially in multi-user environments! And NEVER SHARE THE PRIVATE KEY!
Generate public key of server:
~$ cat /etc/wireguard/server_private.key | wg pubkey | tee /etc/wireguard/server_public.key
Create the configuration file at “/etc/wireguard/wg0.conf”:
[Interface]
Address = {SERVER_VPN_IP}/{SUBNET_PREFIX} # Example: 130.10.0.1/24
ListenPort = {SERVER_PORT}
PrivateKey = {SERVER_PRIVATE_KEY}

PostUp = ufw route allow in on wg0 out on {SERVER_NIC}
PostUp = iptables -t nat -I POSTROUTING -o {SERVER_NIC} -j MASQUERADE
PostUp = ip6tables -t nat -I POSTROUTING -o {SERVER_NIC} -j MASQUERADE
PostDown = ufw route delete allow in on wg0 out on {SERVER_NIC}
PostDown = iptables -t nat -D POSTROUTING -o {SERVER_NIC} -j MASQUERADE
PostDown = ip6tables -t nat -D POSTROUTING -o {SERVER_NIC} -j MASQUERADE
Replace SERVER_VPN_IP, SUBNET, SERVER_PORT, SERVER_PRIVATE_KEY and SERVER_NIC with your own values (delete curly braces):
- SERVER_VPN_IP: IP address of your server in virtual network
- SUBNET_PREFIX: Subnet prefix of virtual network
- SERVER_PORT: Port number which WireGuard will listen on. 51820 is usually prefered but since it’s usually prefered, I recommend not to use it.
- SERVER_PRIVATE_KEY: The key which we just generated at “
/etc/wireguard/server_private.key” - SERVER_NIC: Network interface which has the public IP. You can run “
ip a” to find out (it’s usually eth0).
Change configuration file permissions since it includes server private key:
~$ chmod 600 /etc/wireguard/wg0.conf
Configure and start ufw (uncomplicated firewall)
Run following:
~$ ufw default deny incoming
~$ ufw default allow outgoing
~$ ufw allow {WIREGUARD_PORT}/udp
~$ ufw allow {SSH_PORT}/tcp
~$ ufw enable
Replace SSH_PORT and WIREGUARD_PORT(as specified in config file) with your own values (delete curly braces).
Here, it is assumed that there are no listening ports other than SSH and WireGuard. If you already have some services that needs to listen other specific ports, allow them.
Setting up the client side
Install wireguard to client
Install the wireguard package from your distribution’s repositories.
- For Fedora/RHEL based distros:
~$ dnf install wireguard
- For Debian/Ubuntu based distros:
~$ apt install wireguard
Creating keys and configuration file
Generate private-public keys for the client and change file permissions(as we generated in the server):
~$ mkdir /etc/wireguard && cd /etc/wireguard
~$ wg genkey | tee /etc/wireguard/client_private.key
~$ cat /etc/wireguard/client_private.key | wg pubkey | tee /etc/wireguard/client_public.key
~$ chmod 600 /etc/wireguard/client_private.key
Create the configuration file at “/etc/wireguard/wg-client0.conf”:
[Interface]
Address = {CLIENT_VPN_IP}/{SUBNET_PREFIX}  #Example: 130.10.0.2/24
PrivateKey = {CLIENT_PRIVATE_KEY}

[Peer]
PublicKey = {SERVER_PUBLIC_KEY}
AllowedIPs = {NETWORK_ADDRESS}/{SUBNET_PREFIX}  #Example: 130.10.0.0/24
Endpoint = {SERVER_PUBLIC_IP}:{SERVER_PORT}
PersistentKeepalive = 25
Change client directory permissions (only owner/root can read+write+execute):
~$ chmod 700 /etc/wireguard
Add client to server config as peer
Add following to server configuration for each client:
[Peer]
PublicKey = {CLIENT_PUBLIC_KEY}
AllowedIPs = {CLIENT_VPN_IP}/{ALLOWED_SUBNET_PREFIX}  #Example: 130.10.0.2/32
Enable and restart Systemd services for WireGuard
On server:
~$ systemctl enable wg-quick@wg0
~$ systemctl restart wg-quick@wg0
On client:
~$ systemctl enable wg-quick@wg-client0
~$ systemctl restart wg-quick@wg-client0
Test connection
wg showto print current state of WireGuard on both client and server
On server:
systemctl status wg-quick@wg0.serviceping {CLIENT_VPN_IP}
On client:
systemctl status wg-quick@wg-client0.serviceping {SERVER_VPN_IP}